Step 1 – Summary of Project
I created this presentation to show my understanding of the work and presentation process as well as how to create a fast 5-10 minuet slide show. During the process of making this slide show I learned how to make my slide show using the made to stick success model. The made to stick model is a 6 principle model that states that your presentation should be simple, unexpected, concrete, credible,emotional, and be story driven this is suppose to keep your presentation from taking to long to build and to keep it from being boring
Step 2 – What is Good Presentation?
- identify your core message
- clear your mind
- get of the web to focus on what is important (get away from technology)
- so what? (identify what your point and why dose it matter what is important always use restraint and ask yourself dose this help my audiences point of view)
- keep it very visual
- make your story something your audience can latch on to
- grouping (taking a step back)
- storyboarding (map out your story)
- give it a story
what I learned from the sample is that I have been doing my Power Points wrong for my whole life. That allowed me to learn how to create a blog that engages your audience in a way that makes them part of the presentation
when creating your storyboard you want to be away from technology more than any other part of the video so you mind is clear and you’re not distracted.
Always site the images that you use for copyright purposes. Copyright is a law that states that you cant take images music character designs and more of the internet and use it as your own without written permission. A good way to make sure that you site your images is to use creative commons. Creative commons is a site that gives you images that people have posted to be used by others.
Step 3 – Brainwriting and Brainstorming Idea
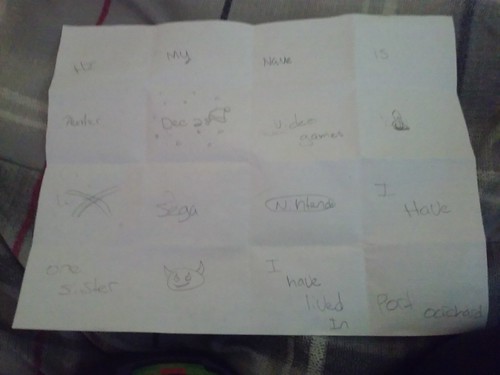
What is brainwriting and brainstorming and why do we do it. brainwriting is when you write down what you are interested in of what you are good as and so on. this helps when you brainstorm your slide show. When brainstorming you want to be away from the computer. This makes it so you can think clearly and come up with better ideas. Now the difference between brainstorm and brainwriting is that when you are brainstorming you are just coming up with ideas but when you are brainwriting you are putting the plan for your slide show on paper

Step 4 – Creating the Storyboard
The story board is when you draw out your presentation on a pice of paper so you can see how it will look and see if it all works together. You want your storyboard to not only represent how your presentation will look but also how it feels. If your storyboard feels one sided your audience will get board. You want to include your audience and make them feel like part of the presentation. Why you write a storyboard is because when you are around technology there are too many distractions.

Step 5 – Gathering and Citing Images
When you are using images you can’t just get a image of Google. Unfortunately there are a few steps you have to take care off. To get your images without breaking the law you have to cite them in your projects in a works cited portion of your presentation. To get photos you have to go to the creative commons website. The creative commons is a free to use site that gives you images that were posted to be used by the public. Now to make sure you don’t break the law you have to follow out lines stated in the copyright law. Copyright law is a law that prohibits you from using other peoples material as your own.
Step 6 – Creating the Master Slide
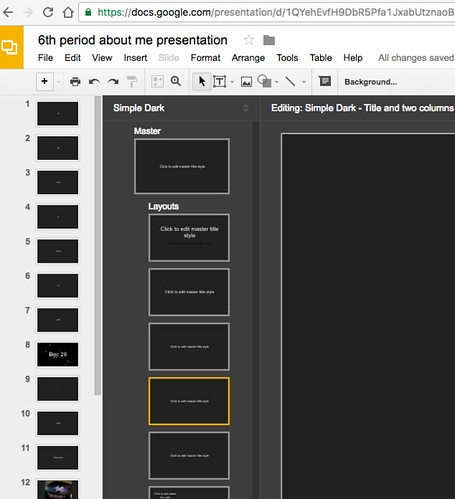
The master slide is the slide that is used for every slide. I used the master slide to format my presentation because the presentation is suppose to be very simple and each slide is suppose to have one to two words or a picture. More than that the master slide is suppose to control the look of your presentation.
Step 7 – Building the Slide Show
When creating my slide show I started with the words then moved on to the media. The reason I did this is so I could focus on one thing at a time. One thing I have learned is that if you start to get too creative you will stop making progress on your slide show. A good way to keep you from getting off track is to use the made to stick success model which not only helps you stay on task but also out lines the 6 principles that you should use in your presentation.

Step 8 – Sharing the Slide Show
I made my presentation a voice thread video. Why I did this is mostly so I can learn how voice thread works but I also wanted to see what was in the recording room.
Step 9 – Preparing to Present/Pitch
DEADLY sins of speaking
- gossip
- judging
- complaining
- excuses
- negativity
Honesty
Authenticity
integrity
Loving
- register your voice make sure people can hear you and speak from your chest
- timbre how your voice feels
- prosody how you end your sentence NOT AS A QUESTION
- pace how fast, slow, of quiet you are
- pitch how your voice sounds is it high or low
- change your posture for two minuets
- stand with a high power pose (wonder woman pose)
- people who power pose experience a increase in testosterone
- tiny tweaks can leave to big changes
How I prepared for my presentation is I used a program called Voice Thread. Voice tread allowed me to present my presentation as a video. to prepare for using voice thread is tested the program twice to see how my voice sounded on the microphone then I started to record. A tip that I suggest that you use is never record your voice one do it multiple time because chances are you are going to mess up at least five time before you even begin to get it right then do it five times more and them you are ready to record you final voice thread.
Step 10 – What I Learned
Aside from learning how to make my presentation better I also learned how to do what will be a big part of my game design class. One thing that I will learn about through this process is what my classmates are like. That will be important because I will eventually be working with these people so the more I learn about them the easier it will be to work with them.